Magick
Get information
Transparency
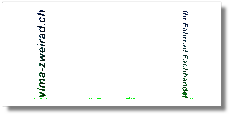
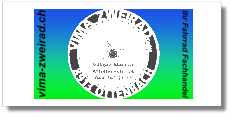
Input image:
![]()
See transparency of an image: magick input.png -alpha extract mask.png && qimgv mask.png

Identify if transparency in the image : magick identify -format "%f: %[channels]\n" logo.png
If input.png: srgba 4.0 or rgba there is transparency but not if gray or rgb
Resize
Keep aspect ration
# resize all if height > 100
magick mogrify -resize x100^> *png
# resize all if width < 100
magick mogrify -resize 100^< *png
Resize and Extend
magick Sponsor1.png -resize x244 -gravity center -extent 470x244 Sponsor1b.png
Add margin around
magick input.png -bordercolor none -border 20 output.png
magick input.png -background none -gravity center -extent 120%x120% output.png
Montage
center, take care of the number of pictures (here horizontal 12 pictures), need to be resize with height before with this examples
magick montage *.png -tile 12x1 -gravity center Merge.png
horizontal
magick *.png +append horizontal.png
magick *.png -append vertical.png
Sharpen
magick Bild_1.jpg -sharpen 0x5 Bild_1.png
Convert
Image to matrice - cut the image in pieces
convert image.jpg -crop 50%x50% +repage piece_%d.jpg
flex to single tif with regex
magick.exe convert %input% -set filename:f "%%t_%%s" +adjoin "%%[filename:f].tif"
From to (jpg, pdf …), rotate …
magick mogrify -format jpg *.ppm
mogrify -format pdf *jpg
mogrify -rotate "270" *jpg
jpg to pdf
in 1 folder, 1 jpg for 1 page in a pdf
:: Will convert all jpg from a folder in a page in a pdf
for /F "usebackq delims=" %A in (`ls ^|grep -s jpg ^| tr "\n" " "`) do convert -quality 85 %A output.pdf
pdf to png/jpg
magick -density 300 -trim in.pdf -quality 100 out.png
-density 300 sets the dpi that the PDF is rendered at. -trim removes any edge pixels that are the same color as the corner pixels. -quality 100 sets the JPEG compression quality to the highest quality.
crop or trim
crop
magick input.gif -coalesce -repage 0x0 -crop WxH+X+Y +repage output.gif
magick giphy.gif -coalesce -repage 0x0 -crop 84x139+100+149 +repage output.gif
You can use qimgv to get the dimension of the crop easily
trim
Remove the white edges by trimming and setting the white background to transparent:
magick input.png -fuzz 40% -trim output.png
Remove background
Fuzz
Some comparison from what is explained below with different fuzzy levels
# rembg1
magick input.png -fill none -fuzz 80% -draw "color 0,0 floodfill" output.png
# rembg2
# Really good results. This method makes pixels near white transparent. The -fuzz value determines how similar a pixel needs to be to white to be removed.
magick input.png -fuzz 80% -transparent white output.png
# rembg3
magick input.png -channel RGBA -fuzz 80% -fill none -opaque white output.png
💡 The code to create those is done on wsl and can be found here
80%
| Original | rembg1_80 | rembg2_80 | rembg3_80 |
|---|---|---|---|
 |
 |
 |
 |
 |
 |
 |
 |
 |
 |
 |
 |
 |
 |
 |
 |
 |
 |
 |
 |
 |
 |
 |
 |
 |
 |
 |
 |
 |
 |
 |
 |
 |
 |
 |
 |
 |
 |
 |
 |
 |
 |
 |
 |
 |
 |
 |
 |
 |
 |
 |
 |
 |
 |
 |
 |
 |
 |
 |
 |
50%
| Original | rembg1_50 | rembg2_50 | rembg3_50 |
|---|---|---|---|
|
 |
 |
 |
|
 |
 |
 |
|
 |
 |
 |
|
 |
 |
 |
|
 |
 |
 |
|
 |
 |
 |
|
 |
 |
 |
|
 |
 |
 |
|
 |
 |
 |
|
 |
 |
 |
|
 |
 |
 |
|
 |
 |
 |
|
 |
 |
 |
|
 |
 |
 |
|
 |
 |
 |
25%
| Original | rembg1_25 | rembg2_25 | rembg3_25 |
|---|---|---|---|
|
 |
 |
 |
|
 |
 |
 |
|
 |
 |
 |
|
 |
 |
 |
|
 |
 |
 |
|
 |
 |
 |
|
 |
 |
 |
|
 |
 |
 |
|
 |
 |
 |
|
 |
 |
 |
|
 |
 |
 |
|
 |
 |
 |
|
 |
 |
 |
|
 |
 |
 |
|
 |
 |
 |
For Gif
magick input.gif -transparent black g%01d.png
magick -dispose background g*.png output.gif
Part of the source and official manual
Replace color
# Adapt the fuzz
magick input.png -fuzz 80% -fill black -opaque white output1.png
magick input.png -fuzz 80% -fill "#000000" -opaque "#ffffff" output2.png

# keep the transparency level
magick input.png  -channel RGB -auto-level    +level-colors black    output3.png
-input: 
- ouput1:

- ouput2:

- ouput3:

Check this out to replace colors to a certain ton and keep transparency
With some explanation and modification. Really good method, keep transparency. If 2 color will remove the whiter one and change the darker one for what you want.
magick logo.png -colorspace gray -contrast-stretch 0 +level-colors "none,#9370DB"  logo2.png && qimgv logo2.png
# -colorspace gray				Converts the image to grayscale.
# -contrast-stretch 0 			Automatically maximize contrast based on the darkest and brightest pixels.
# +level-colors "none,#9370DB"		+level-colors A,B maps black → A and white → B, with intermediate grays forming a gradient. none is transparent

# can be combined with -negate, or -transparent yourcolor:
convert "$1" -channel RGB -auto-level +level-colors "$2" "${1%.*}_uColor1.png"
convert "$1" -colorspace gray -contrast-stretch 0 +level-colors "none,$2" -transparent black "${1%.*}_uColor2.png"
convert "$1" -negate -colorspace gray -contrast-stretch 0 +level-colors "none,$2" -transparent black "${1%.*}_uColor3.png"
⚠️⚠️⚠️ If you have problem with some pixel try to remove -contrast-stretch 0
![]() ➡️
➡️
![]()
Replace non tranparent pixel to a color
Flat recolor
What it does:
colorize 100→ replaces all existing colors with the given -fill color.- Transparency is preserved (alpha channel is untouche- d).
- All opaque pixels become solid red.-
- No gradients are created; the color is uniform.-
- Good for logos or images where you want a flat color- .
Key points:
- The original shades of the image are ignored.
- The effect is deterministic and flat.
magick input.png -fill "#ff0000" -colorize 100 output.png
 ➡️
➡️

Levels-based recolor
What it does:
channel RGB→ only affects the RGB channels, alpha unchanged.auto-level→ stretches the darkest pixel → black and brightest pixel → white.- Normalizes contrast across the image.
+level-colors "#9370DB"→ maps grayscale values to a color gradient:- Black → #9370DB
- White → default (or another color if specified)
- Mid-gray → interpolated between black & white colors
Key points:
- Produces a gradient of colors, not a flat fill.
- Preserves shading / contrast from the original image.
- Good for artistic recoloring where you want shadows/highlights to remain visible.
- Transparency may be tricky — if the image has alpha, +level-colors doesn’t reliably preserve it.
magick input.png -channel RGB -auto-level +level-colors "#9370DB" output.png
➡️

Comparison of those 2 methods
| Original | Flat | Level |
|---|---|---|
|
 |
 |
|
 |
 |
|
 |
 |
|
 |
 |
|
 |
 |
|
 |
 |
|
 |
 |
|
 |
 |
|
 |
 |
|
 |
 |
|
 |
 |
|
 |
 |
|
 |
 |
|
 |
 |
 |
 |
 |
 |
 |
 |
 |
 |
 |
 |
 |
 |
Trim empty pixels
magick img.png -define trim:edges=north,south -trim +repage img2.png
magick mogrify -define trim:edges=north,south -trim +repage -path edited\images\dir *.png
input

output

Batch examples
Level brightness
@echo off
SETLOCAL ENABLEDELAYEDEXPANSION

echo Choose where your jpg files are (choose 1 jpg):

:: file choose and get dir
set dialog="about:<input type=file id=FILE><script>FILE.click();new ActiveXObject
set dialog=%dialog%('Scripting.FileSystemObject').GetStandardStream(1).WriteLine(FILE.value);
set dialog=%dialog%close();resizeTo(0,0);</script>"

for /f "tokens=* delims=" %%p in ('mshta.exe %dialog%') do set "input=%%p"
for /F %%i in ("%input%") do @set dir=%%~dpi
for /F %%i in ("%input%") do @set drive=%%~di

%drive%
cd %dir%


:: User input number of channel

set /p channel="At which level do you wanna set the white point ? (20 mean 20 percent of the actual, just test and MAKE A COPY OF YOUR FILE) : "
set /a channel=channel

:: give info on what will be done
dir /a-d /b "*jpg" | find /c "jpg" > temp
set /p nfiles= < temp
set /a nfiles=nfiles
set /a xfile=1
del temp

set /p tt=%nfiles% jpg will be processed, type Enter to continue.


:: convert in tiff and rename it
FOR /F "delims=" %%a IN ('dir /a-d /b "*jpg"') DO (
    H:\TEMP\Software\ImageMagick-7.0.8-Q16\magick.exe convert %%a -level "0%%,%channel%%%,1" %%a
    echo 1 more done ...
)
Flex files to tiff
@echo off
SETLOCAL ENABLEDELAYEDEXPANSION

echo Choose where your flex files are (choose 1 flex):

:: file choose and get dir
set dialog="about:<input type=file id=FILE><script>FILE.click();new ActiveXObject
set dialog=%dialog%('Scripting.FileSystemObject').GetStandardStream(1).WriteLine(FILE.value);
set dialog=%dialog%close();resizeTo(0,0);</script>"

for /f "tokens=* delims=" %%p in ('mshta.exe %dialog%') do set "input=%%p"
for /F %%i in ("%input%") do @set dir=%%~dpi
for /F %%i in ("%input%") do @set drive=%%~di

%drive%
cd %dir%
mkdir TIFF

:: User input number of channel

set /p channel="How many Channel you have ? "
set /a channel=channel

:: give info on what will be done
dir /a-d /b "*flex" | find /c "flex" > temp
set /p nfiles= < temp
set /a nfiles=nfiles
set /a xfile=1
del temp

set /p tt=%nfiles% flex will be processed, type Enter to continue.


:: convert in tiff and rename it
FOR /F "delims=" %%a IN ('dir /a-d /b "*flex"') DO (
    H:\TEMP\Software\ImageMagick-7.0.8-Q16\magick.exe convert %%a -set filename:f "%%t_%%s" +adjoin "TIFF\%%[filename:f].tif"
    dir /b "*.tif" | find /c "%%~na" > temp
    set /p howmany= < temp
    set /a howmany=!howmany!
    del temp
    set /a loopfi=howmany/channel
    :: order dir by date /od
    cd TIFF
    FOR /F "delims=" %%b IN ('dir /a-d /b /od "%%~na*tif"') DO (
        FOR /l %%c IN (1, 1, !loopfi!) DO (
            FOR /l %%d IN (1, 1, %channel%) DO (
                ren %%b TIFF\%%~na_ch%%d_fi%%c.tif

            )
        )
    )
    cd ..
    echo !xfile! flex / !nfiles!
)
reduce number of frame gif
# check number of frames
convert input.gif[-1] -format %[scene] info:
    # or
     exiftool input.gif | grep "Frame Count"
# identify frame rate
gifsicle -I input.gif | grep delay
# use gifsicle to convert in lower colors
gifsicle --colors=255 input.gif -o output.gif
# remove some frames
# source: https://graphicdesign.stackexchange.com/a/20937/157170
gifsicle -U output.gif `seq -f "#%g" 0 2 2569` -O2 -o output2.gif
# recheck
convert output2.gif[-1] -format %[scene] info:
# set again speed, in 100 of second. Here identify showed :     disposal asis delay 0.07s
# so I set to 14/100 seconds
gifsicle -d 14 output2.gif -o output3.gif
mp4 to gif
# check fps:
exiftool Uphill.mp4 | grep -i "video frame"
# calculate the delay
echo 100/fps | bc
# convert with Magick
convert -delay 3 GetReady2.mp4 -loop 0 GetReady2.gif